Google Slides is presentation software that’s part of Google Workspace and consumer Gmail.
Any presentation can be enhanced by adding audio.
In this post, we’ll explain how to insert audio files, including background music clips, into one or more individual slides.
We cover recording voiceovers on top of Google Slides presentations in a separate article.
Embed an audio file in Google Slides
In Google Slides presentation mode, a presenter or a viewer can click a speaker icon to play an audio file. It’s also possible for the sound to start playing automatically on a slide change.
One use case is an embedded audio file that can be used to verbally expand on the information that’s visible on the slide.
Another use case is, while collaborating on the development of a business presentation, an audio file is a way to verbally describe the intent of a slide to a collaborator or reviewer.
For whatever reason you add sound, it will bring slides to life and make your audience more engaged.
Steps for adding audio
Adding an audio file to a Google slide is a multi-step process.
- Record a voice annotation on your computer
Use a free program such as Audacity to record your voice and save the recording to a .mp3 or a .wav file.
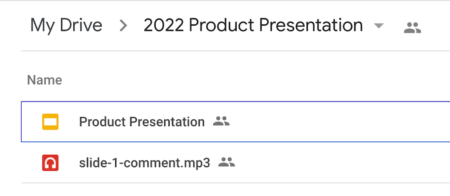
- Upload the audio file to Google Drive
Add the audio file to the same folder as your presentation, so that anyone you share the folder with can both view the presentation and hear the audio.
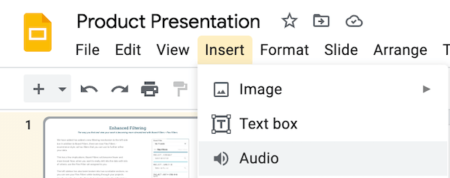
- Insert the audio file into a slide
From the menu, select Insert > Audio. Locate the file on your Google Drive and click the Select button.
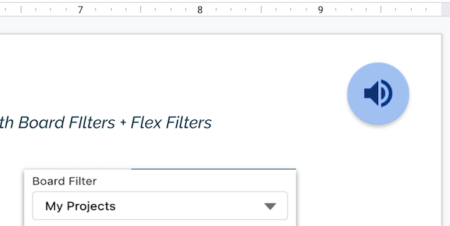
- Position and format the icon
Using drag & drop along with formatting options, you can reposition, resize, and recolor the speaker icon.
Under Format options for the audio icon, there is an Audio playback section.

In the Audio playback section, you can set an audio file to start playing automatically. You can adjust the playback volume. You can also set the audio to loop.
Presentation tips
If you are presenting to a live audience, make sure to connect the audio from your laptop to an external speaker, using Bluetooth if possible.
If you are presenting online, you may need to loop your “audio out” into the same feed as your microphone for meeting attendees to hear sound.
If you’re interested in adding a YouTube or Google Drive video to Google Slides, we have a separate article on that topic.